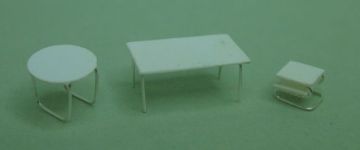
Here's three different types of tables. Left to right: a table with what I (for lack of a better term) call continuous legs, one with four separate legs, and a small side table with a newspaper shelf. For the larger tables, I suggest dimensions that would suit a dining table. Vary the size to make a coffeetable.
Supplies and tools
- Silver color copper wire (craft supply), about 0.3 mm thick (e.g. #28).
- Wire cutters
- Tacky Glue
- Pliers (smooth jaw)
- Your chosen material for the tabletop - I used bits of business card, which I painted
- For the dining tables only:
- 4 mm (5/32") square stripwood (for a coffetable, use a smaller size stripwood to get shorter legs). Two 4 to 5 cm (1.5" to 2") long bits needed for a table with continuous legs, just one for separate legs
- For the side table only:
- Two bits of 1.5 by 3 mm (1/16" by 1/8") stripwood, each about 4 to 5 cm (1.5" to 2") long
- A strip of card, same width as the stripwood or a little less
- Two small craft clamps
Table with continuous legs

Follow the directions on the bench page, but using 4 mm (5/32") square stripwood. If you want the legs lower but with the same spacing, use stripwood with the same width but less thickness.
I cut the round tabletop using a 6 mm (1/4") Fiskars punch, and my rectangular tabletop is 6.5 mm (1/4") wide and 12 mm (1/2") long. Make yours any size you like!
Table with four separate legs

Cut 5 cm (2") of wire and make a right-angle bend near the center.

Grip the area around the bend with pliers. Right where the wire ends emerge from between the pliers, they should be spaced roughly like two adjacent legs at the finished table will be. If you're making a round or square table, it's best if they're a little closer together than that, so you have room for adjustment.
Bend the wires at right angles, the extending ends should be parallel to each other.
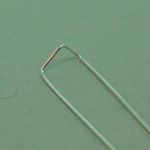
This is what it'll look like. You'll need two of these.
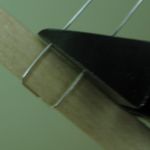
Place each pair of legs over the stripwood, align the wire cutters with the edge of the stripwood and cut off the excess wire. This defines the height of the legs.
Cut out and paint your tabletop. The measurements I used are listed in the section about the table with continuous legs.

Adjust the leg spacing to fit your tabletop, simply by closing or opening up the V-shape part of the table leg pairs. Glue them in place.
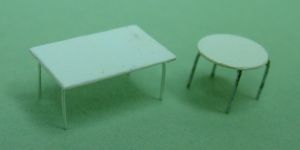
That's all, the table is finished!
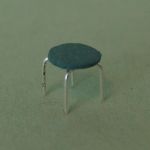
This stool is based on the same design as the table, but I used a 3 mm (1/8") Fiskars paper punch for the seat, and the legs are cut against 3/32" stripwood.
I don't know if such stools existed in the Art Deco era, but they were popular in the 1950s or 1960s.
Side table


This little square table with a newspaper shelf underneath, is actually made in the same way as the chair. The difference is that the wires are bent one more time before cutting off the excess, thus creating a support for the tabletop. Compare this sketch of the completed wire frame to the ones on the chair page, and follow the chair how-to with just this small adaption.
The shelf is glued where the chair seat would've been. I cut the tabletop square, and the shelf the same width but about 0.5 mm (1/64") less deep.
